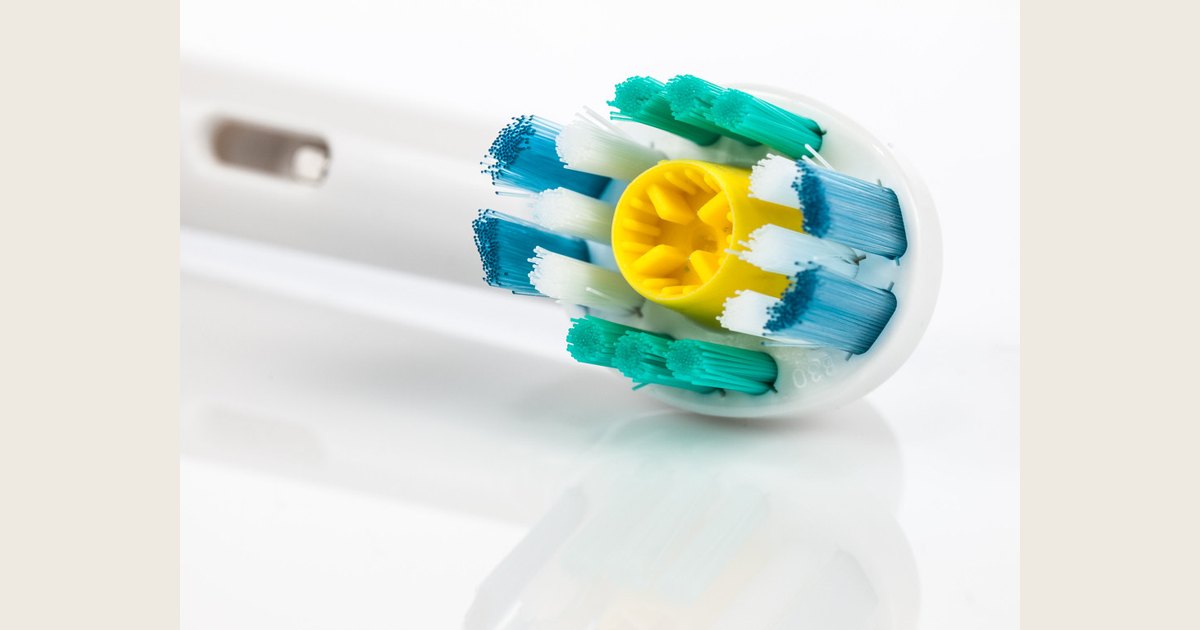
To use an electric toothbrush, add fluoride toothpaste to a soft-bristled compatible head, place the bristles at the gumline, then guide the running brush slowly from tooth to tooth with light pressure. Cover the outer, inner, and chewing surfaces for two minutes—without scrubbing. The American Dental Association (ADA) says both manual and powered toothbrushes can remove plaque effectively when used properly, and recommends brushing twice a day for two minutes with fluoride toothpaste (ADA).
Cover image credit: Photo: “Electric Toothbrush Head” by wwarby, licensed CC BY 2.0. Resized and padded. Illustrative stock photo; no product testing is implied.
Key Takeaways
- Let the powered head do its normal motion while you guide it across every tooth surface; hard scrubbing is unnecessary.
- Aim bristles toward the gumline, use gentle pressure, and spend a full two minutes brushing twice daily with fluoride toothpaste (ADA).
- A four-part, 30-seconds-per-area routine can make it easier to avoid skipping the inner surfaces and back teeth.
- An electric toothbrush does not replace cleaning between your teeth. The National Institute of Dental and Craniofacial Research (NIDCR) recommends doing that regularly, aiming for daily (NIDCR).
Before you turn it on: set up for a gentle clean
The best electric-toothbrush technique is controlled, not forceful. Start with a soft-bristled brush head that fits your handle, fluoride toothpaste, and a way to track two minutes if your particular model does not do it for you. The ADA recommends soft bristles and gentle pressure to help limit gum injury; it also recommends placing bristles at roughly a 45-degree angle toward the gumline (ADA).
| What to prepare | Why it helps |
|---|---|
| A charged or powered handle and compatible soft-bristled head | The brush needs to be ready before you begin; soft bristles support a gentler technique. |
| Fluoride toothpaste | Fluoride toothpaste is part of the ADA’s twice-daily brushing recommendation. |
| A two-minute timer, if needed | Time is easier to meet when you can see or hear it. |
| Your brush’s instructions | Head shapes, modes, charging, water resistance, and alerts differ by model. |
Do not assume that every electric toothbrush has the same timer, pressure warning, or cleaning mode. If the handle has unfamiliar controls, follow its manual rather than copying a setting from another model.
How to use an electric toothbrush in six practical steps
1. Apply toothpaste and position the head first
Put fluoride toothpaste on the brush head. Before switching the handle on, rest the bristles against the outside of a back tooth, with the bristles directed toward the gumline. Starting with the head in your mouth is a simple way to keep toothpaste from scattering around the sink.
Keep your grip relaxed. Think of the handle as a pointer rather than a scrub brush: guide the moving head around the mouth with a quiet wrist instead of pressing it into the gums. If a dentist or hygienist has given you a personalized brushing plan, use that plan instead of this general routine.
2. Guide the brush across the outside surfaces
Turn the brush on and begin at one back tooth. Hold the head at the gumline briefly, then make small, deliberate shifts to the next tooth. Continue around the outside of the upper and lower teeth.
The goal is steady contact with each surface, not a fast sweeping pass. The ADA’s general advice is to use gentle short strokes at the gumline. With an electric toothbrush, let the head’s built-in movement do its job while your hand controls where it goes (ADA).
3. Clean the inside surfaces, especially the front teeth
Move to the tongue-side surfaces of your teeth. These are easy to overlook because they are less visible in a mirror. Adjust the handle until the head reaches the inside of the lower and upper front teeth without forcing it.
For inside front surfaces, the ADA’s general technique is to tilt the brush vertically and make several up-and-down strokes. A powered head may be shaped differently, so follow your model’s instructions if they call for another position. Either way, work gently and make sure the bristles contact the inner surface and gumline.
4. Brush chewing surfaces and your tongue
Guide the bristles over the chewing surfaces of molars and premolars, including the grooves. Then make a gentle pass over your tongue. NIDCR advises brushing all sides of each tooth and brushing the tongue as part of a complete oral-hygiene routine (NIDCR).
Do not chase a “squeaky clean” feeling by pushing harder. Coverage and gentle contact are more useful goals than pressure.
5. Finish the full two minutes—and clean between teeth separately
Stay with the routine until you have reached two minutes. The ADA specifically recommends two minutes, twice a day, with fluoride toothpaste (ADA).
Brushing is only one part of home care. Plaque can remain between teeth, where a toothbrush head cannot reach well. NIDCR recommends cleaning between teeth regularly, aiming for once a day, with floss or a suitable interdental tool (NIDCR). If you are weighing your options, our guide to whether water flossers are as good as string floss explains an important comparison.
6. Rinse and store the brush properly
After brushing, rinse the head thoroughly to clear toothpaste and debris. Store the toothbrush upright and let it air-dry rather than closing a damp brush in a container. Do not share a toothbrush. These are ADA toothbrush-care recommendations, and they apply to electric brush heads as well as manual brushes (ADA).
Use a four-zone map to avoid missed spots
A two-minute timer is helpful, but it does not guarantee that you have brushed every surface. If you catch yourself returning to the front teeth after only a few seconds, use a simple four-zone map. Spend about 30 seconds on each area, moving through outer, inner, and chewing surfaces before continuing.
| Time | Area to cover | Reminder |
|---|---|---|
| First 30 seconds | Upper right | Start at the back and work toward the front. |
| Next 30 seconds | Upper left | Do not skip the tooth-side surfaces near the tongue. |
| Next 30 seconds | Lower left | Take the brush behind the last molar if it reaches comfortably. |
| Final 30 seconds | Lower right | Finish all tooth surfaces; include a brief tongue pass within your two minutes. |
This is an organizing method, not a rule that every brush must follow. If your model divides time differently, or your dental professional has asked you to concentrate on a particular area, use that guidance.
Electric toothbrush vs. manual toothbrush: what changes and what does not
An electric toothbrush can make the hand motion easier to manage, but it is not an automatic substitute for thoughtful coverage. The ADA says manual and powered toothbrushes are both effective at removing plaque. Powered brushes may be easier to use for people with limited hand control, for some children and older adults, or for people with braces; they can also cost more (ADA).
| With an electric toothbrush | With a manual toothbrush |
|---|---|
| You guide a moving head slowly across each surface. | You create the brushing motion yourself. |
| Timers, pressure alerts, modes, and charging arrangements depend on the model. | There is no charging or device setting to learn. |
| A compatible replacement head is needed. | The entire toothbrush is replaced when worn. |
| Gentle pressure and full-surface coverage still matter. | Gentle pressure and full-surface coverage still matter. |
There is no need to force a powered brush to mimic a manual scrub. Choose the type you can use gently and consistently, and ask your dental professional for advice if you have a condition or appliance that changes your home-care needs.
Common electric-toothbrush mistakes and quick fixes
| Mistake | Why it gets in the way | What to do instead |
|---|---|---|
| Pressing hard or scrubbing | More force can irritate gums and does not improve your coverage. | Lighten your grip. If your model has a pressure alert, treat it as a cue to ease off. |
| Staying on the visible front teeth | Inner surfaces, gumlines, and back molars can be missed. | Use the four-zone route and start at a back tooth. |
| Stopping before two minutes | Short sessions make it easier to leave surfaces untreated. | Use a separate timer if your brush does not provide one. |
| Treating brushing as a replacement for interdental cleaning | A toothbrush does not fully clean between teeth. | Add the floss or interdental method that your dental professional recommends. |
| Continuing with frayed bristles | Worn bristles become less effective. | Replace the head on schedule or sooner when bristles are matted or frayed. |
The ADA advises replacing toothbrushes about every three to four months, or earlier when bristles are visibly matted or frayed (ADA). For a detachable electric-brush head, use that interval unless your manufacturer or dental professional gives you different instructions.
If the brush suddenly feels weak, stops early, will not charge, or has a loose head, consult the model’s instructions before using it again. Do not improvise a repair to the handle or charger. If brushing causes pain, ongoing bleeding, or worsening sensitivity, avoid solving it with more pressure; contact a dentist or hygienist for individualized guidance.
Frequently asked questions
Do you need to move an electric toothbrush around your mouth?
Yes. The powered motion does not move the head from tooth to tooth for you. Guide it across the outer, inner, and chewing surfaces with small, controlled shifts. The exact head position and motion may vary by model, so use its instructions for model-specific features.
How hard should you press with an electric toothbrush?
Use gentle pressure. The ADA recommends gentle pressure and a soft-bristled toothbrush to help reduce the risk of gum injury (ADA). If you notice that you are flattening the bristles against your gums, relax your hand.
How long should you brush with an electric toothbrush?
Brush for two minutes, twice a day, using fluoride toothpaste. That is the ADA’s recommendation for both powered and manual toothbrushes (ADA).
Can you use an electric toothbrush with braces?
Usually, a powered toothbrush can be an option. The ADA notes that people with dental appliances such as braces may find a powered toothbrush easier to use. Still, you need to clean all accessible tooth surfaces and follow the instructions from your orthodontic or dental team (ADA).
When should you replace an electric toothbrush head?
Replace it about every three to four months, or sooner if the bristles are matted or frayed, unless the manufacturer gives a different replacement schedule. Rinse the head after use and let it air-dry upright between uses (ADA).
How this guide is sourced
This is a general consumer guide, not product testing or individualized dental care. Lather and Care based the practical technique above on the American Dental Association’s toothbrush guidance and the National Institute of Dental and Craniofacial Research’s oral-hygiene guidance, both independently retrieved on September 17, 2026. We did not test or endorse any toothbrush. Use the manufacturer’s instructions for model-specific controls and ask a dentist or hygienist about individual concerns. Browse more Lather and Care guides.
The bottom line
Using an electric toothbrush well is mostly about gentle, complete coverage: aim the bristles at the gumline, guide the head tooth by tooth, and brush for two minutes twice daily with fluoride toothpaste. Keep cleaning between your teeth as a separate step, replace worn heads, and rely on your brush manual for model-specific controls. This general technique cannot replace individualized advice from your dental professional.